
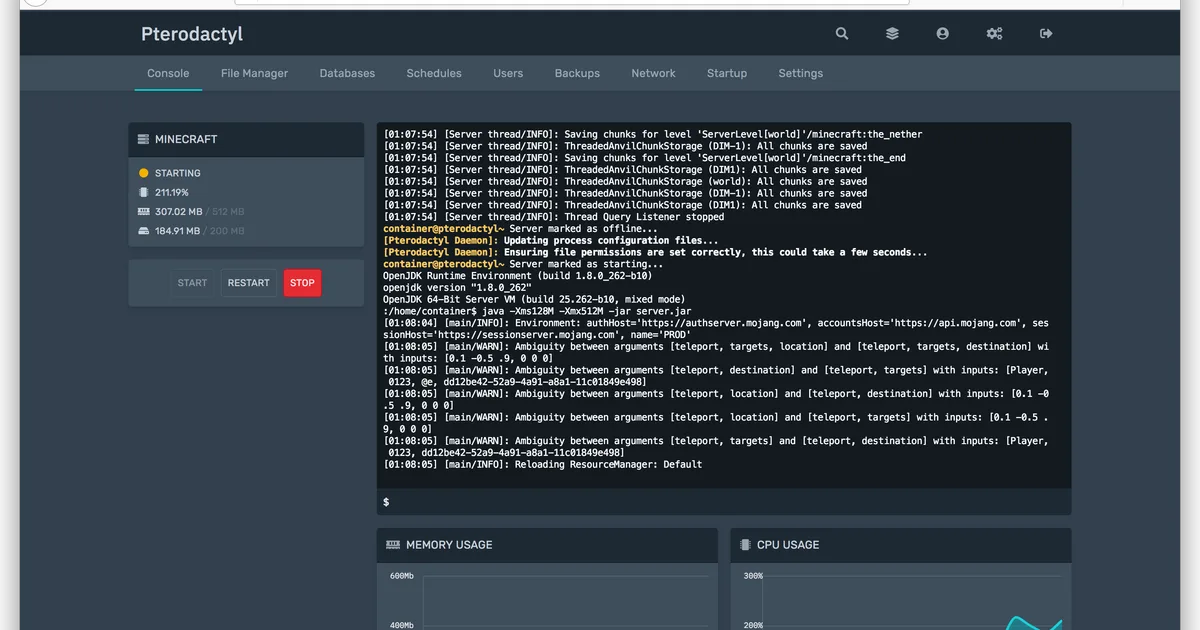
Pterodactyl Panel Installation on a VDS: Step by Step
Install Pterodactyl Panel and Wings on your own VDS: requirements, database, webserver, Docker, node pairing and creating your first game server.
Pterodactyl Panel Installation on a VDS
Pterodactyl is an open-source panel that lets you manage all of your game servers from a single web interface. Our servers ship at the operating system level with full root access rather than with a preinstalled game panel, so users who want a panel install Pterodactyl on their own VDS themselves. This guide follows the installation flow from the official documentation.
The payoff is simple: instead of juggling separate SSH sessions for Minecraft, Rust, Terraria and a Discord bot, you start, stop, watch the console and edit files for all of them from one place.
1. Panel and Wings Are Two Different Things
Pterodactyl is not a single program. It is two components working together.
| Component | What it does | Where it runs |
|---|---|---|
| Panel | The web interface written in PHP and React. Stores users, servers and node records | On the machine with the webserver |
| Wings | The Go service that talks to Docker and actually runs the game servers | On the machine hosting the game servers |
The official documentation defines a node as “a physical machine that runs an instance of Wings”. Panel and Wings can live on the same server, which is the common setup for small and mid-sized installs. As you grow, the Panel stays where it is and you add new nodes for the game servers.
Every game server runs inside an isolated Docker container. CPU and RAM limits are enforced at the container level, so one server going wild does not directly drag the others down.
💡 License: Pterodactyl is MIT licensed and free. There is no licensing barrier to commercial use, including selling servers to customers through the panel. Modifying and redistributing the source is also allowed under MIT terms.
2. Requirements
Operating systems the official documentation lists as supported:
| Distribution | Versions |
|---|---|
| Ubuntu | 22.04, 24.04 |
| Debian | 11, 12, 13 |
| RHEL / Rocky Linux / AlmaLinux | 8, 9 |
On the Panel side you need:
- PHP 8.2 or 8.3 (the docs recommend 8.3) with the cli, openssl, gd, mysql, PDO, mbstring, tokenizer, bcmath, xml/dom, curl and zip extensions, plus fpm for NGINX
- Database: MySQL 5.7.22 or higher (MySQL 8 recommended) or MariaDB 10.2 or higher
- Redis
- Webserver: NGINX, Apache or Caddy
- curl, tar, unzip, git and Composer v2
Wings only needs a Linux system capable of running Docker containers. The docs add an important warning here: Virtuozzo, OpenVZ and LXC are generally unsupported, while KVM is guaranteed to be compatible. Check your virtualization type with:
systemd-detect-virtYou also need a domain pointing at the Panel. If the Panel uses SSL, a certificate must be created for the Wings FQDN as well.
3. Installing the Panel Dependencies
The command sequence from the official docs for Ubuntu:
apt -y install software-properties-common curl apt-transport-https ca-certificates gnupg
LC_ALL=C.UTF-8 add-apt-repository -y ppa:ondrej/php
curl -fsSL https://packages.redis.io/gpg | sudo gpg --dearmor -o /usr/share/keyrings/redis-archive-keyring.gpg
echo "deb [signed-by=/usr/share/keyrings/redis-archive-keyring.gpg] https://packages.redis.io/deb $(lsb_release -cs) main" | sudo tee /etc/apt/sources.list.d/redis.list
apt update
apt -y install php8.3 php8.3-{common,cli,gd,mysql,mbstring,bcmath,xml,fpm,curl,zip} mariadb-server nginx tar unzip git redis-serverComposer:
curl -sS https://getcomposer.org/installer | sudo php -- --install-dir=/usr/local/bin --filename=composer4. Database and User
Create a dedicated database user for the Panel:
CREATE USER 'pterodactyl'@'127.0.0.1' IDENTIFIED BY 'somePassword';
CREATE DATABASE panel;
GRANT ALL PRIVILEGES ON panel.* TO 'pterodactyl'@'127.0.0.1';Do not keep the sample password. If the database lives on a different machine than the Panel, use that machine’s IP instead of 127.0.0.1; for external connections you also need bind-address=0.0.0.0 in my.cnf and port 3306 open in the firewall. Open that port to your own node IPs only, never to the world.
5. Panel Files and the Setup Wizard
mkdir -p /var/www/pterodactyl
cd /var/www/pterodactyl
curl -Lo panel.tar.gz https://github.com/pterodactyl/panel/releases/latest/download/panel.tar.gz
tar -xzvf panel.tar.gz
chmod -R 755 storage/* bootstrap/cache/
cp .env.example .env
COMPOSER_ALLOW_SUPERUSER=1 composer install --no-dev --optimize-autoloaderThen configuration and the first administrator account:
php artisan key:generate --force
php artisan p:environment:setup
php artisan p:environment:database
php artisan p:environment:mail
php artisan migrate --seed --force
php artisan p:user:makeDo not lose the APP_KEY that key:generate produces. If that value in .env changes, encrypted data cannot be decrypted and cannot be recovered.
File ownership depends on your webserver:
# NGINX, Apache or Caddy (non-RHEL distributions)
chown -R www-data:www-data /var/www/pterodactyl/*
# NGINX on RHEL / Rocky / AlmaLinux
chown -R nginx:nginx /var/www/pterodactyl/*6. Scheduler and Queue Worker
Crontab entry for the Panel’s scheduled tasks:
* * * * * php /var/www/pterodactyl/artisan schedule:run >> /dev/null 2>&1The queue worker is defined in /etc/systemd/system/pteroq.service:
[Unit]
Description=Pterodactyl Queue Worker
After=redis-server.service
[Service]
User=www-data
Group=www-data
Restart=always
ExecStart=/usr/bin/php /var/www/pterodactyl/artisan queue:work --queue=high,standard,low --sleep=3 --tries=3
StartLimitInterval=180
StartLimitBurst=30
RestartSec=5s
[Install]
WantedBy=multi-user.targetsudo systemctl enable --now pteroq.serviceIf this service is not running, backups and scheduled tasks quietly never run. Check its status right after installation.
7. Webserver and SSL
Remove the default NGINX configuration first:
rm /etc/nginx/sites-enabled/defaultCreate the certificate before applying the SSL configuration. The docs are blunt about this: when using the SSL configuration you must create SSL certificates, otherwise the webserver will fail to start.
sudo apt update
sudo apt install -y certbot python3-certbot-nginx
certbot certonly --nginx -d example.comA daily cron entry for renewals:
0 23 * * * certbot renew --quiet --deploy-hook "systemctl restart nginx"Copy the ready-made NGINX server block for the Panel from the official webserver configuration page. It contains an HTTP to HTTPS redirect block, TLS 1.2/1.3 settings, the PHP-FPM socket and a 100 MB upload limit. Enable the file with:
sudo ln -s /etc/nginx/sites-available/pterodactyl.conf /etc/nginx/sites-enabled/pterodactyl.conf
sudo systemctl restart nginxThe symlink step is unnecessary on RHEL, Rocky Linux and AlmaLinux.
At this point your domain should serve the panel interface and the account you made with p:user:make should log in. You still cannot run a game server; that needs Wings.
8. Installing Wings
Install Docker and enable it on boot:
curl -sSL https://get.docker.com/ | CHANNEL=stable bash
sudo systemctl enable --now dockerIf this is your first time with Docker, our Docker installation on a VDS guide covers the basics.
Linux kernel 6.1 and later enables swap accounting by default. On older kernels, add swapaccount=1 to GRUB_CMDLINE_LINUX_DEFAULT in /etc/default/grub, then run sudo update-grub and reboot.
The Wings binary:
sudo mkdir -p /etc/pterodactyl
curl -L -o /usr/local/bin/wings "https://github.com/pterodactyl/wings/releases/latest/download/wings_linux_$([[ "$(uname -m)" == "x86_64" ]] && echo "amd64" || echo "arm64")"
sudo chmod u+x /usr/local/bin/wingsThe service file, /etc/systemd/system/wings.service:
[Unit]
Description=Pterodactyl Wings Daemon
After=docker.service
Requires=docker.service
PartOf=docker.service
[Service]
User=root
WorkingDirectory=/etc/pterodactyl
LimitNOFILE=4096
PIDFile=/var/run/wings/daemon.pid
ExecStart=/usr/local/bin/wings
Restart=on-failure
StartLimitInterval=180
StartLimitBurst=30
RestartSec=5s
[Install]
WantedBy=multi-user.targetBefore starting the service you need the configuration file from the Panel, which is the next step.
9. Creating and Pairing a Node
Create a new node from the admin area of the Panel. Once the node record exists there are two ways forward:
- Open the node’s Configuration tab, copy the code block and paste it into
/etc/pterodactyl/config.yml - Press Generate Token, copy the bash command it gives you and run it on the server
Both produce the same result: a config.yml telling Wings which Panel address and token to use. Then test it by hand before handing it to systemd:
sudo wings --debug
sudo systemctl enable --now wingsWhat an allocation is
The documentation defines an allocation as “a combination of IP and Port that you can assign to a server”, and every created server must have at least one. In practice you predefine ports on the node (25565 for Minecraft, 28015 for Rust) and pick one of them when creating a server.
Find the IP to use for allocations with:
hostname -I | awk '{print $1}'Do not use 127.0.0.1 for allocations; players cannot connect to that address.
Ports you need to open
| Port | Protocol | Used for |
|---|---|---|
| 80, 443 | TCP | Panel interface |
| 8080 | TCP | Wings (HTTP) |
| 8443 | TCP | Wings (HTTPS) |
| 2022 | TCP | SFTP access to server files |
| Allocation ports | TCP/UDP | The game traffic itself |
sudo ufw allow 8080/tcp
sudo ufw allow 2022/tcp10. Creating Your First Game Server
Pterodactyl organises game definitions around two concepts. A nest is usually a game or service (Minecraft, Teamspeak, Terraria). An egg holds the configuration for a specific variant of it (Vanilla, Spigot, Bungeecord). The Panel ships with a few nests, and the community eggs repository has many more.
When you create a server from the admin area you pick, in order:
- The user who will own the server
- The node it runs on and an allocation on that node
- The nest and egg, which brings its own Docker image
- CPU, RAM and disk limits
- Egg-specific variables such as version number or jar file name
On save, Wings runs an installation container, downloads the game files and hands you a ready server. You can watch the progress from the server’s console tab.
💡 A Docker image carries everything the server needs to run. For Minecraft you do not install Java separately; it comes inside the image. That is why servers wanting different Java versions can sit side by side on the same node.
11. Common Problems
The Panel errors out with no detail on screen. Read the Laravel log:
tail -n 100 /var/www/pterodactyl/storage/logs/laravel-$(date +%F).logThe node will not connect and the console stays blank. Check, in order: is systemctl status wings running, does the Wings configuration match the node settings in the admin area, are ports 8080/8443 and 2022 open in the firewall, has the certificate expired. Test connectivity directly:
curl https://example.com:8080Panel and Wings must use the same scheme. If one is HTTPS and the other HTTP, the connection never forms.
Invalid MAC exception. The APP_KEY in .env has changed. Without restoring the original key the data cannot be decrypted.
Containers have no internet. Wings defaults to the 1.1.1.1 and 1.0.0.1 DNS servers. Find your host’s own DNS and replace those values in /etc/pterodactyl/config.yml rather than adding to them:
resolvectl status
cat /etc/resolv.confSchedules do not fire. Read the queue log, clear the cache, and confirm the system, the Panel .env and the Wings config.yml all agree on the timezone:
journalctl -xeu pteroq
systemctl restart pteroq
php /var/www/pterodactyl/artisan schedule:clear-cacheWhen Panel and Wings share one server, the docs suggest adding an /etc/hosts entry so the machine reaches itself directly instead of looping out through its public domain.
12. Sizing and Package Selection
Resource planning for a Pterodactyl install is the sum of three things:
- The Panel: PHP-FPM, MariaDB, Redis and NGINX. On small installs that is roughly 1 to 2 GB of RAM
- Wings and Docker: The service itself is light, the real cost is disk. Every egg pulls its own Docker image and those images add up to several GB
- The game servers: This is where the consumption actually lives. Give a server 4 GB in the panel and those 4 GB are genuinely reserved
So the answer to “what do I need for the panel” depends on what you plan to run underneath it. The matching below assumes Panel and Wings on the same machine:
| Scenario | Suggested package | Why |
|---|---|---|
| Trying the panel out, 1-2 light servers (Terraria, small Minecraft) | ENT-3 (4 cores Xeon Gold 6230R, 6 GB RAM, 60 GB SSD) | The Panel takes about 2 GB, the remaining 4 GB covers two small servers |
| A group of friends, 3-4 servers | ENT-4 (6 cores, 8 GB RAM, 80 GB SSD) | More headroom on disk for Docker images and server files |
| A community, 5-8 servers | ENT-7 (12 cores, 16 GB RAM, 160 GB SSD) | With several servers busy at once, the load per core drops |
| Games sensitive to single-core speed (Minecraft, Rust) | PRO-3 (6 cores Ryzen Threadripper PRO 5975WX, 8 GB RAM, 80 GB NVMe) | In these games single-core performance is what sets your TPS |
| A busy network, selling servers through the panel | PRO-6 (12 cores Ryzen, 16 GB RAM, 160 GB NVMe) | Many containers active at once need both cores and NVMe disk |
Current configurations and pricing are on the Xeon Enterprise VDS and Ryzen Premium VDS pages. If Minecraft is the only thing running under the panel, the player-count matching on our Minecraft server hosting page is a useful cross-check.
💡 The panel lets you assign limits that add up to more than the physical capacity, which is called overallocation. It works as long as the servers are never all full at the same time, but if they all fill up on the same evening the machine starts swapping. Keep that margin narrow on your own install.
Conclusion
Installing Pterodactyl looks long, but the flow is clear: bring the Panel up behind a webserver, install Wings with Docker, then pair the two through a node and an allocation. In return you stop opening a separate SSH session per game server and manage everything from one interface.
The panel runs on your server, under your control. We provide the hardware and the network underneath; which panel you install and which version you run is your call.
👉 Start with our game server packages. If you plan to host several games under one panel, the Ryzen Premium VDS options leave more room to scale.